
Planning an event is stressful enough. There’s catering to manage, speakers to wrangle, and a million tiny details to track. The last thing you need is to spend two hours wrestling with a Microsoft Word mail merge to get your hundreds or thousands of name badges printed.
Here is how to take a spreadsheet of hundreds or thousands of guests names and turn it into a perfectly formatted PDF of printable name badges in about three clicks using File Splice.
What You Need Before You Start
To make this lightning fast, just have two things ready on your desktop:
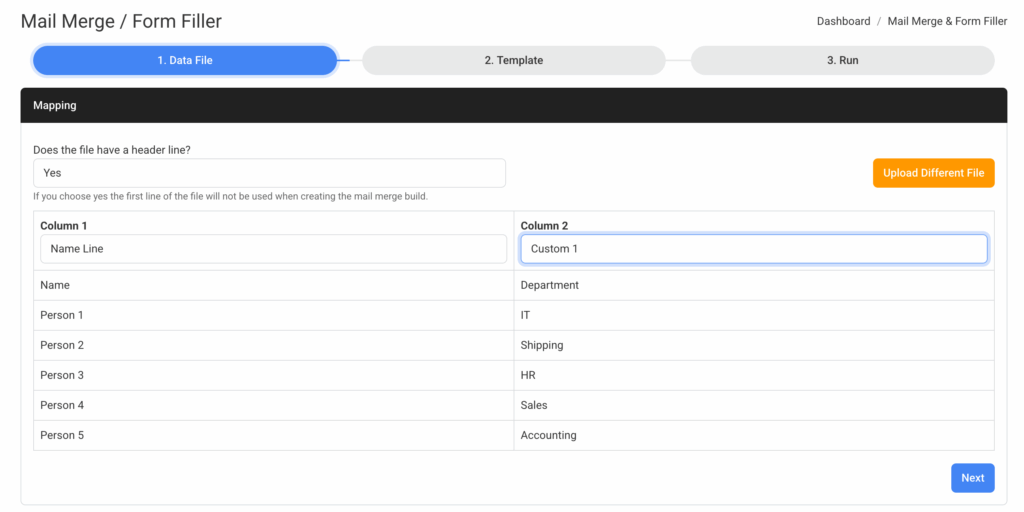
- Your Data: A .XSLX or CSV file containing your attendee names (and any other information you want on the badge, job title, department, company, etc.). You can have up to 20 columns of variable data and each can be added in a different position or font size on the badge.
- Your Design: A background image for your badge (PDF or JPG with your event logo or a nice border, or just plain white).

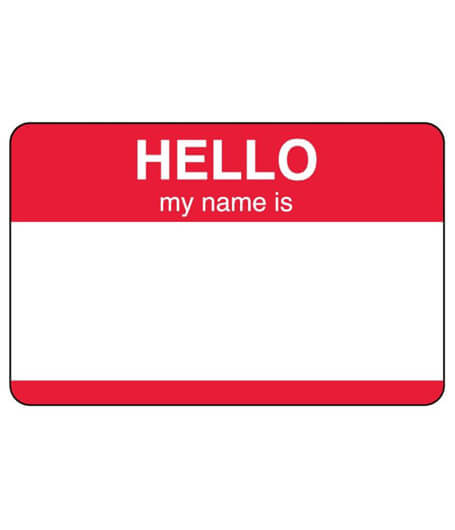
Make sure this design is the size of whatever name badge you are going to use. Just the single name badge, not the full sheet. We’ll help you out, here is a blank PDF for the GOAT of name badges, the Avery 5395
Ready? Let’s go.
Step 1: Upload Your Files
Head over to the File Splice Mail Merge Tool.
First, drag and drop your .CSV or Excel file in the upload box and map the columns like this:
Next, upload your design image of the badge in PDF or JPG format.
Remember this can be any kind of design or simply a blank file. Just make sure it’s accurate in size to the template you are going to print on.
Step 2: Overlay Your Names And Information
Now for the fun part. You will see your badge design on the screen. On the right you’ll see a few buttons. One will be “add variable” the other “add custom text”.
The add variable button will give you a choice to add the columns you mapped earlier, for example %Name% or %Custom1%. Add these and position them over the badge design where you want them and in the size you want.
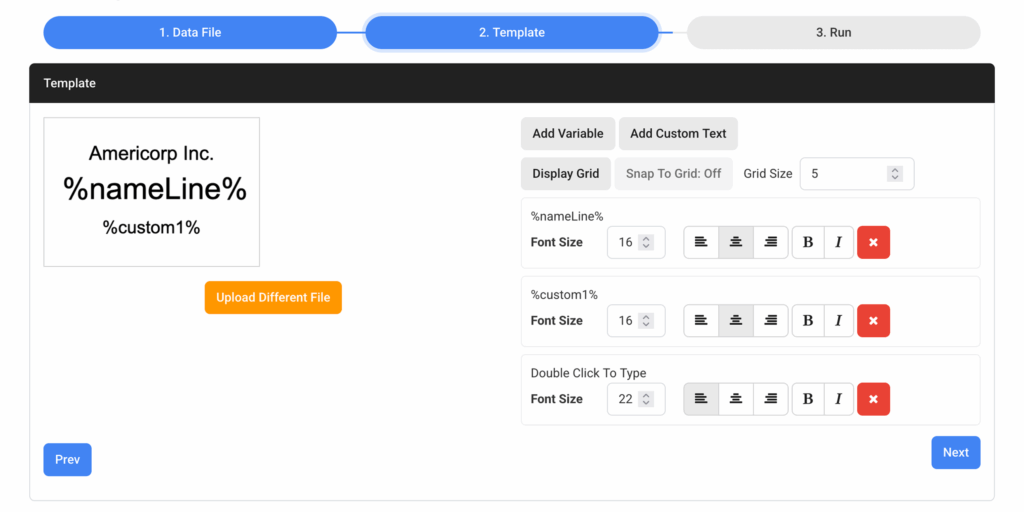
The “add custom text” button is static text that will appear the same on all your badges so use this for something like your company name or the event name since you want it the same on everyone’s name badges.
Step 3: Merge and (If You Want) Impose
If you were using Word, this is where things usually fall apart. But with File Splice, this is where we shine.
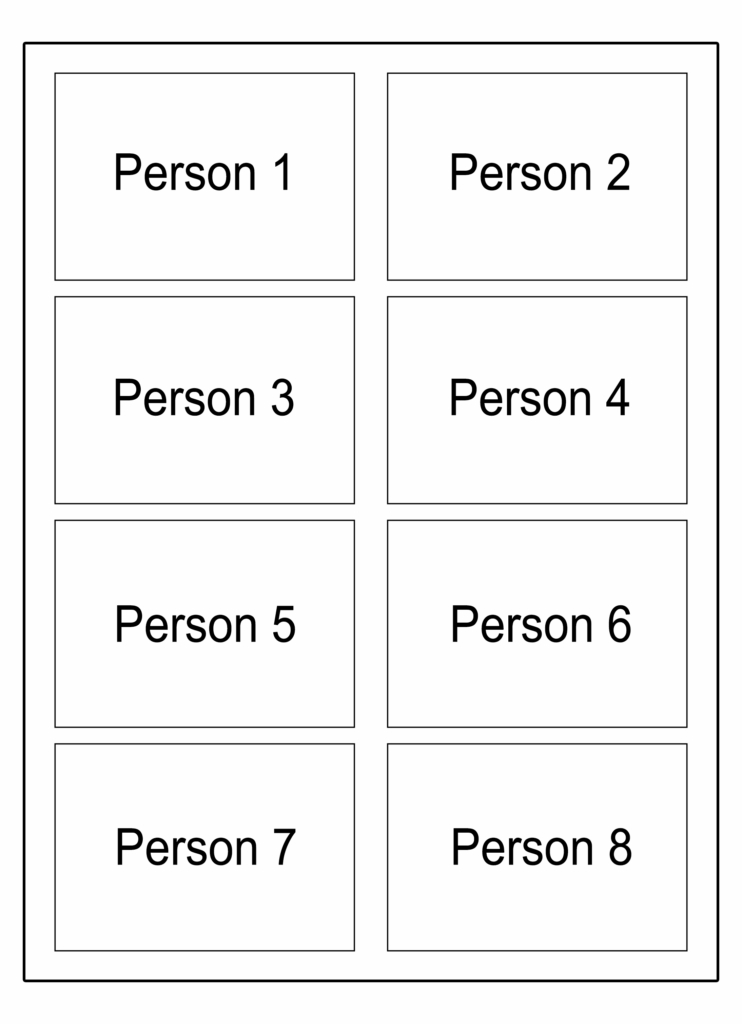
On this last step 3 which is the “run” step of the mail merge tool you can either select one per page or a template for N-Up Layout.
What this means is that if you want all of your name badges as individual PDFs leave this setting at “one per page” and you’ll get each name badge as a single PDF.
However, if you are using the Avery 5395 select that template from the drop down and the system will automatically snap the files into the 8-up layout of the 5395 template. Now you can go right to the printer.
Side note here, you can create any size template you need using these simple instructions. So if you have some odd size 10-up shaped sticker paper you are using for name badges don’t worry, we got you.
That’s it, you’re done.
Why is this so much easier that using Microsoft Word and others?
Traditional mail merge tools were designed decades ago and frankly they just haven’t been improved. They are clunky and they weren’t made with ease of use in mind.
File Splice was built specifically with ease of use in mind to handle visual data merging and n-up layouts in a single process. It’s quick, painless, and it works every time anywhere you can log in online.
That’s another thing we forgot to mention. File Splice lives in the cloud so you can create your name badges on site instantly. This comes in handy at the registration table if you have some last minute attendees who need name badges.
Stop fighting with Word and your printer settings. Use the File Splice Mail Merge tool and create your huge list of name badge files before your coffee gets cold.
If you are stuck just email us, we always offer free setup and support.
Frequently Asked Questions
Do I need to install any software to make this work? No. File Splice is 100% cloud-based. You can create your badges from any web browser on a Mac, PC, or even a Chromebook. This is especially helpful if you are at an event venue and need to print last minute badges from a different computer.
What Does This Cost? Less than your morning Starbucks run. Seriously. You can sign up, get your project done in minutes, and cancel immediately if you want. There are no setup fees or long term contracts. Check out our pricing page to see just how affordable sanity can be.
What if I’m not using Avery paper? No problem. While we have standard templates like the Avery 5395 built in, you can easily create a custom layout for any paper size or sticker sheet you have. If you know the dimensions of your paper, you can set it up in seconds.
Can I create badges with just a first name? Yes. You have full control over what data appears on the badge. If your spreadsheet has full names but you only want the First Name to appear, split the first name into one column and the last name into another so you have full control to place the names separately and in different font sizes.
What happens if a guest has a really long name? When you place the text box on your design, you define the space available. If a name is too long, you can easily adjust the font size for that specific badge or ensure your text box is wide enough to accommodate it during the preview stage.
I have a weird specific layout I can’t figure out, and I don’t know what I’m doing. Can you help? Absolutely. We offer free setup support. Just email us and we’re happy to jump in and see what we can do.