
If you’ve ever tried to mail merge inside Microsoft Word, you know it can be… fussy. Lots of pop-ups, tiny dialog boxes, margins that have a mind of their own and way too many clicks just to get a stack of personalized mail created.
If you already have your list in Excel and your letter/base image in Word, our File Splice Mail Merge tool lets you skip all that. Export your files, drop them into the browser, and get print-ready files in just a couple of clicks.
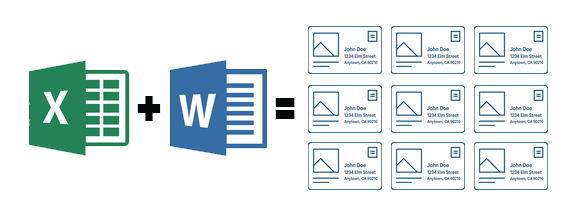
Below is a simple 3 step walk through you can use as a guide for “How to mail merge from Excel to Word”.
Done within Word:
Step 1: Prep your Excel list (and save it as CSV)
Start with your data in Excel:
- Put each piece (or group) of information in its own column: First Name, Last Name, Address, City, State, ZIP, etc.
- Pro Tip: the fewer columns, the easier this is.. For example if you can, combine first and last name into one column that is just “name”.
- Clean up extra spaces, blank rows, and typos.
When it looks good:
- In Excel, go to File → Save As.
- Choose CSV (Comma delimited) as the file type.
- Name it and save the file.
This CSV is what you’ll upload to the File Splice mail merge tool. Each column will become a text field you can place on your letter/base image.
Step 2: Turn your Word doc into a PDF template
Next, take your existing Word document (the letter/postcard/mailer you want to personalize) and turn it into a PDF:
- Open your letter in Microsoft Word.
- Go to File → Save As (or Export).
- Choose PDF as the file type and name it and save it.
This PDF is your “background file” or base image. Our mail merge tool can use PDFs or JPGs as the background file.
Done within File Splice:
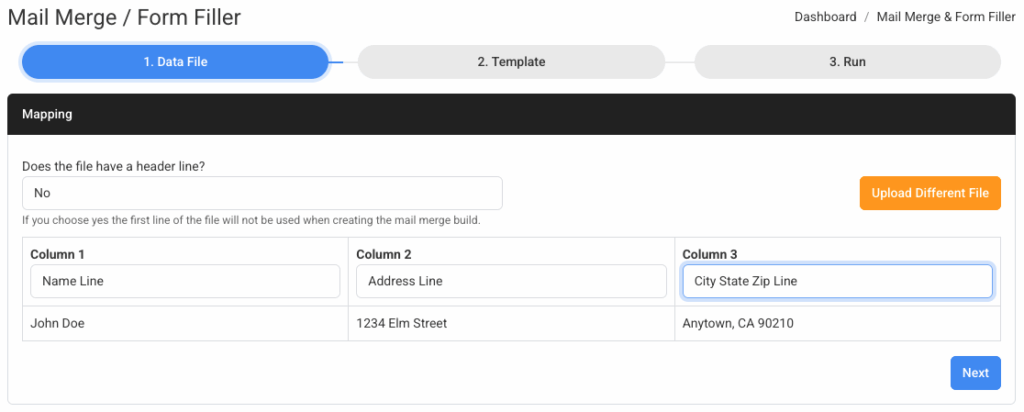
Step 3: Upload to File Splice and merge everything
- In the Mail Merge tool Upload your CSV file. Drag and drop it into the upload area. Each column becomes a field you can use. You can map the columns as you like up to 20 columns.
- Upload your base PDF you saved from Word in the template step.
- Add and position your text fields.
- Add an address block or individual fields (like First Name) anywhere on the page.
- Choose which column from your CSV each text field should use.
- Adjust font size and position so everything lines up on your letter. Turn the grid on to help you align all your text fields.
- Add an address block or individual fields (like First Name) anywhere on the page.
When you’re happy with the layout, click the start button to build your file. File Splice will create a merged PDF with one personalized page per row from your Excel file.
If you want to take it a step further you can select a template and the system will impose multiple files N-up on a page at the same time. This feature uses the merge tool giving you a perfectly imposed, print ready file you can give to a professional printer saving them the step of doing the imposition in house.
Why use this instead of Word’s built-in mail merge?
- Fewer steps. You don’t need to click through the Mail Merge Wizard or guess which options to check.
- Visual layout. You can see exactly where each field will land on the page before you build. File Splice mail merge tool is simple and clean.
- Print-ready output. You get a clean PDF, perfect for printing or sharing. Plus you have the option to N-up your files using the merge tool.
- Affordable. Our mail merge pricing is less than most people spend on coffee in a day. Learn more on our pricing page.